
Quickstart
Add your first project, run a scan, read your SiteCMD Score, connect your editor, and hand it the first fix.
This is the short version. If you want detail on installing or on what a scan actually does, see Installation and Your first scan.
1. Open the app
When you open SiteCMD for the first time, it boots straight to the project setup screen. There are no projects yet, no scan history, nothing to look at. That's expected.
2. Add a project
A project is one website. You give it a name and one or more URLs, each tagged with an environment: production, staging, development, or local. The form starts with a single production row.
If you have the source folder on your machine, link it now. SiteCMD reads your package.json, composer.json, requirements.txt, and similar files to detect your stack and pre-fill a sensible local URL. Linking the folder is optional, but it enables Code Scan and tailors fix guides to your framework.
You can add as many projects as you like. Once there's more than one, an Overview page appears above the project list in the sidebar, summarizing every project's score and open issues in one place.
3. Run a scan
Click Run Scan in the top bar and choose Full. SiteCMD checks the live site, then audits the linked source folder if you've connected one. The scan progress overlay shows the current stage and lets you cancel.
4. Read your SiteCMD Score
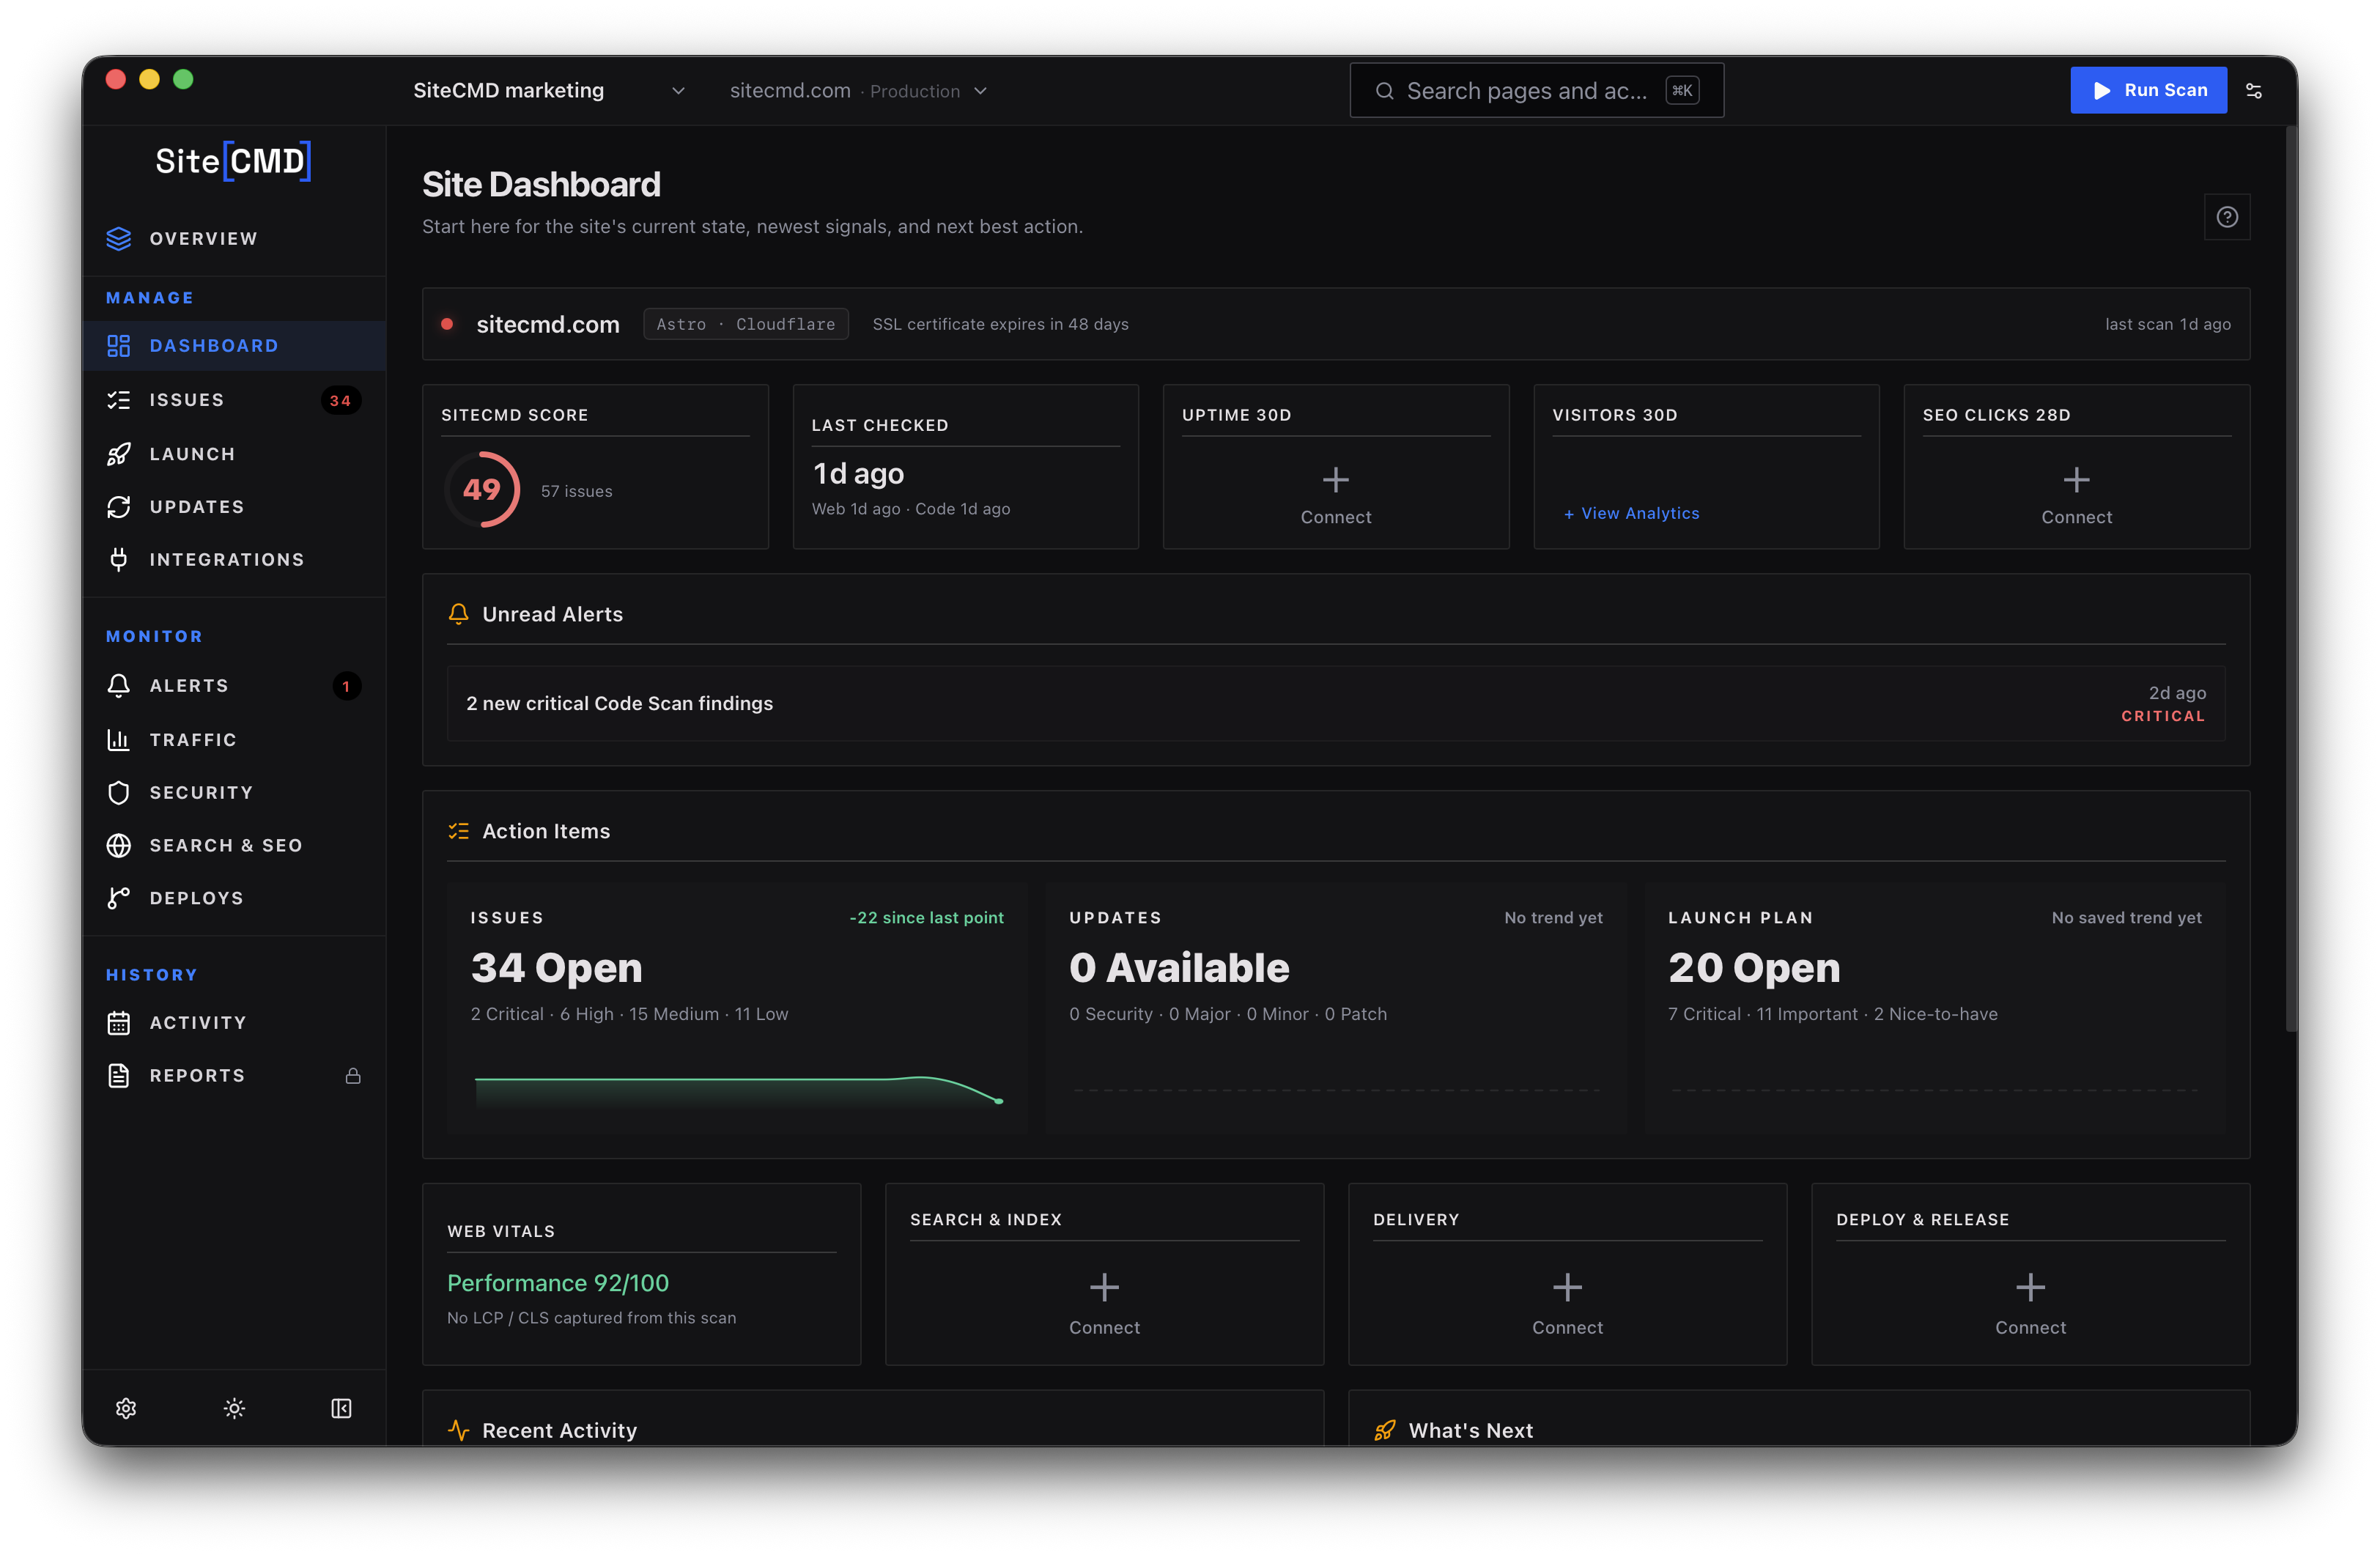
When the scan finishes, the dashboard shows your SiteCMD Score out of 100. Active issues deduct points by severity with diminishing returns and reduced weight for uncertain findings. Verify checks a fix; Ignore, Block, and Snooze exclude an issue according to their lifecycle rules. A cleared issue can leave the displayed integer unchanged because of rounding, a floor, or a cap.
There are no blanket severity cliffs: Critical findings cost the most, but a Critical label alone never locks the score to a fixed number. The one exception is the narrow security cap: an active finding must be Critical, belong to the audited cap-candidate list, and carry explicit High or Confirmed confidence to cap the score at 49. Static patterns emitted as Needs review cannot trigger it. See The SiteCMD Score for the current eligibility rules.
The dashboard shows the top issues driving the score, grouped by category. The fastest way to bring the score up is to start at the top of that list.
5. Connect your editor
Install Node 22.22.1 or newer, then open Integrations in the SiteCMD sidebar and click Connect next to Claude Code, Cursor, Codex, or Windsurf. SiteCMD validates Node, copies its MCP server into a persistent folder, writes the editor's config, and runs a health check; the card reads Connected only when that check passes. For VS Code, Copilot, Cline, Zed, and JetBrains, see AI editor setup.
If you would rather not click through the app, paste the agent setup prompt into Claude Code, Codex, Cursor, or Windsurf instead. The agent registers the server itself and runs the first scan.
6. Hand it the first fix
Restart the editor so it loads the server, open your project, and paste this as your first prompt, with your own URL:
Use SiteCMD MCP's get_issues for https://example.com. Pick one high-priority issue in this repository, explain it briefly, and call start_fix for that issue and its exact source occurrence when applicable. Read get_fix_brief, make the fix, run the project's relevant checks, request_verification, then poll get_fix_status for SiteCMD's verdict. If live-site verification needs a deployment, tell me which environment needs the change before continuing.Keep SiteCMD running during verification. The agent reads the finding, makes the edit, and waits for SiteCMD's independent verdict. You can also start the same flow with Fix with your agent in an issue's detail. Read Fixing with AI editors for status polling and broader scan comparisons.
What's next
- Installation if you want the install details and system requirements.
- Your first scan for what the scan actually checks, how long it takes, and where the results live.
- The SiteCMD Score for how the score math works in detail.
- AI editor setup for the per-editor config blocks, what the server exposes, and the fix loop in full.